Wednesday, 28 March 2012

Before and After

After several weeks of glorious weather, we have practically finished the interior of our 1980's yellow VW campervan. Here it is compared to the first pictures we took back in November and it's quite a transformation.

Add caption


It's gone from a dark, stinky mess to a bright beautiful space. I've added a couple of finishing touches like bunting and other decorations and solar powered rainbow makers (little prisms that spin and scatter rainbows around).

I've also decided that our now quite beautiful van needs a new name to match it's new look as Colonel Mustard doesn't seem to fit anymore. Any suggestions please let us know!


Tuesday, 27 March 2012

Rusty Gutter

A length of metal gutter runs down each side of the van, designed to trap rain and channel it away. Because water accumulates in it, rust is inevitable.

We weren't going to bother sorting out the rusty gutter because we didn't think it looked that bad. However, the more of the van we made look good, the worse the gutter looked in comparison. So we decided to sort it out after all.

Here it is before we started work on it:


The loose stuff was removed with a wire brush, and treated with Kurust. What was left looked pretty shocking!


It then needed to be filled and strengthened with P38.


The P38 was then sanded, and we got the van ready for spraying.


And here's the finished gutter, after spraying. Looks much better.


Monday, 26 March 2012

The Unmentionables

After much debating and deliberating, we bought a portable toilet for the van. If we were just using the van for weekend jaunts, then we wouldn't have bothered as it takes up valuable space, beside the fact that you will be going to the toilet in the kitchen/bedroom/dining room.

But we may be faced with situations when we can't use a public or campsite loo, and although we have both wild camped and done our business outside it's not ideal (especially in the middle of the night!)

So we bought a portable loo, along with some eco-friendly biodegradable fluid for it (better for the environment than that chemical stuff). You can empty it at most campsites, or if necessary empty the contents down a toilet. 


Not a particularly pleasant topic but I have a feeling I may find using it quite amusing.

Friday, 23 March 2012

Back Cupboard

The original back cupboard was a fibreglass and wooden construction covered in a brown carpet fabric. The covering was as horrible and mouldy as the old roof lining. We tried stripping it but it was just too hard and not worth it. So I decided to start from scratch in MDF.

It needed to fit in the back corner of the van and fit the curvature of the van.


I started off with the basic shape.


I then needed to cut out and box in a section at the bottom to allow the engine cover to be removed without having to empty the cupboard first.


I also added a shelf.


And another shelf at the top, with an access hole at the front.


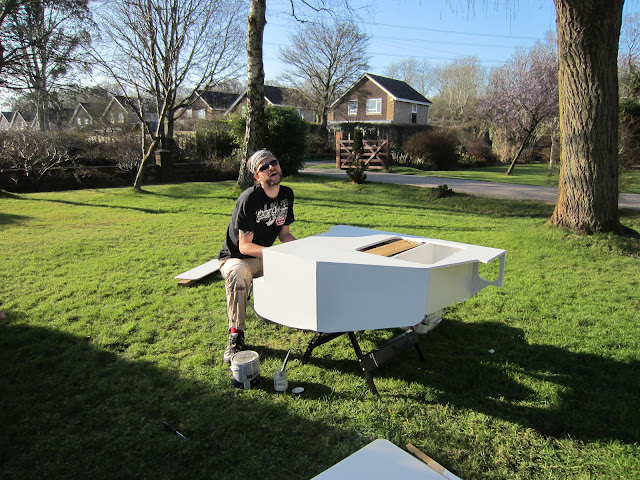
Then painted it white.


Our friend noticed that it looked a little like a miniature grand piano.


We attached fabric to the back of the cupboard to keep clothes away from condensation on the van window.


This is the access hole for the top shelf.


And here it is fitted with its door.


Wednesday, 21 March 2012

Finishing Off The Roof

Today was a very warm and sunny day. So hot that I was working with my shirt off. It's funny to think that a few weeks ago we were working wearing several coats and fleeces and had a heater on in the van, and there was ice on the windows.

We have finally finished the roof, YAY! After the disaster of the horizontal gas strut breaking the roof hinge, we were undecided whether or not to put the horizontal gas strut back on after we'd fixed the hinge. We decided that rather than trying the new 450 Newton again, we'd fit one of the old 300 Newton struts that were weakened to the point where I could compress it by hand. This was so that the roof opened and closed easier, but the hinge wasn't going to break again.


Now that the gas struts were finally finished, it was time to attach the bottom edge of the bellows to the van.


The horizontal gas strut definitely made it easier to open and close the roof, even though it was a very weak one.

Friday, 16 March 2012

New Table Top

We found the original table in the back of the van. It has a central pole that can fit into the middle of the van, or four legs that can be attached so you can use it outside the van. 

Unfortunately (as with everything else in the van) it was in pretty bad condition and so Nick made a new table top out of MDF.  As I painted it white, I thought 'hmmm.......'  because it would make a perfect spot for a bit of artwork.


I'm not one for making detailed plans so I just made it up as I went along really. I decided on a marine theme  as our plan is to drive around the coast, and the blue background was to match the rest of the van.


You are also getting a sneak peak in this post of the new cupboard Nick is building for the back corner. It's not finished yet but once it is I'm sure Nick will tell you all about it. It looks amazing, really professional.

Tuesday, 13 March 2012

Cupboard Doors

Where there was once big black holes there are now beautiful white cupboard doors. Well done Nick.


These have been made from MDF using the original doors as templates, and covered in the same wood effect vinyl as the rest of the unit. Nick then added new handles and catches (to ensure beans don't go tumbling across the van when we go round corners!)


Monday, 12 March 2012

Sunday Driving

Yesterday was a glorious sunny day and everyone it seemed was outside enjoying the first real hint of summer. We decided to take the Colonel out for a run, give the engine a good blast and just enjoy a lazy Sunday drive in the country. 


 It seemed we weren't the only ones - we were sharing the road with hundred's of motorbikes, caterhams, MGs, kit cars, Morgan's, and plenty of campers, including a bay window and a split window VW (both immaculate, and we got our first camper wave from the splitty!) 


It was the longest drive we have taken it on, and it was relatively problem free. The battery needed charging after being sat all winter, but apart from that there were no issues. Nick drove, he said it drives well (considering he usually drives an automatic) but we probably will look at servicing/upgrading the brakes. As one blog writer wrote, you don't so much as apply the breaks but make appointments with them weeks in advance.


Although I haven't driven it yet, I already love being a passenger - it is impossible to go fast, allowing you to look around you and enjoy the view. Apart from the odd cycle - there was never anyone in front of us! 


Sunday, 11 March 2012

More Gas Strut Woes!

The most difficult aspect of this project so far has been working with the roof. Nothing has gone right, nothing has worked first time. After the disaster of a few weeks ago, where one of the roof hinges was torn out of the fibreglass, we were hoping things could only get better.


Nick mended the hinge by reinforcing the area with a plate of steel. 


We then replaced the strut at the back of the van, expecting this to hold up the roof... and it didn't. Had a look round at the front strut and it had broken! We must have done the nut and bolt up too tight and the strut wasn't able to pivot properly. 

So we ordered (another) new strut - making the total count of gas struts in this project to 10!!!

We fitted the new strut, and viola! The roof stayed up! Except today, Nick was lying on the bed and it fell down on its own. More bad times! A bit of research showed that the struts don't work as well when it's cold (it was chilly this morning even though by the afternoon it was lovely).

So now we are still no closer to a fully functioning roof. The saga continues!

LinkWithin

Related Posts Plugin for WordPress, Blogger...